Frequently Asked Questions

Latest Patented Features,  Usage Instructions, and More

1. What to do before wearing the hearing aids?
  1. Check Battery Level: Ensure the hearing aids are charged.
  2. Clean Ear Canal: Gently wipe the outer ear with a cotton swab to remove earwax that might block the ear tip (do not insert into the ear canal).
  3. Check Ear Tips: Inspect for any blockages.
  4. Choose Quiet Environment: For first-time wearers, fitting is recommended in a quiet room.
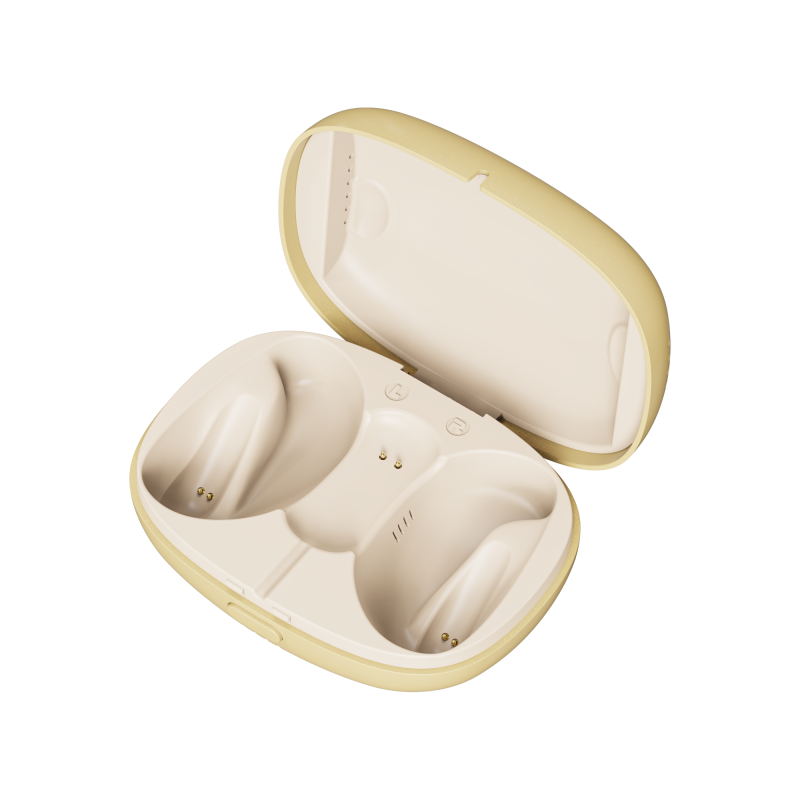
  1. Open the hearing aid charging case and remove the left/right hearing aid.
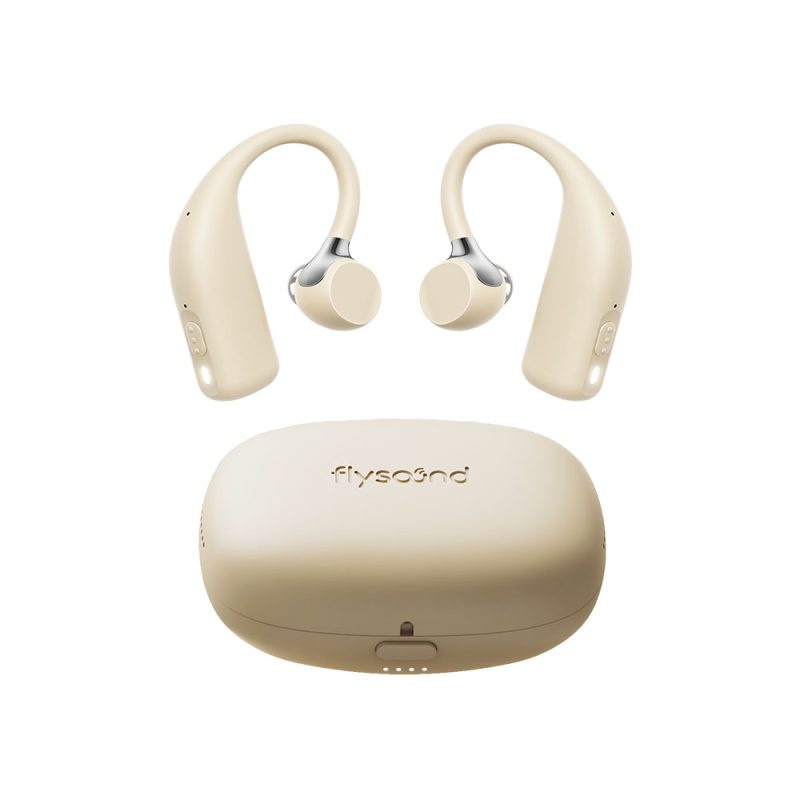
  2. Place the main body of the hearing aid behind your ear, then insert the ear tip into your ear canal. The other hearing aid is worn in the same way.
    Note: Ensure secure placement to prevent accidental slippage during movement.
  1. There are three ways to adjust the volume:
    1. ​​Via Phone APP:​​ Ensure the phone is connected to the hearing aids and fitting is complete. Open the APP, on the main page you'll see the volume adjustment interface. Click the + or - buttons for the left/right ear to adjust.
  2. Via Remote Control:​​ Open the charging case and take out the remote. Press the volume buttons on the remote to adjust the volume for both hearing aids.
  3. Via Hearing Aid Button:​​ Short press the button on the hearing aid to cycle through volume levels. Each press produces one "beep" sound and increases/decreases volume by 3dB. At maximum volume, you'll hear three "beeps". At minimum volume, you'll hear two "beeps".

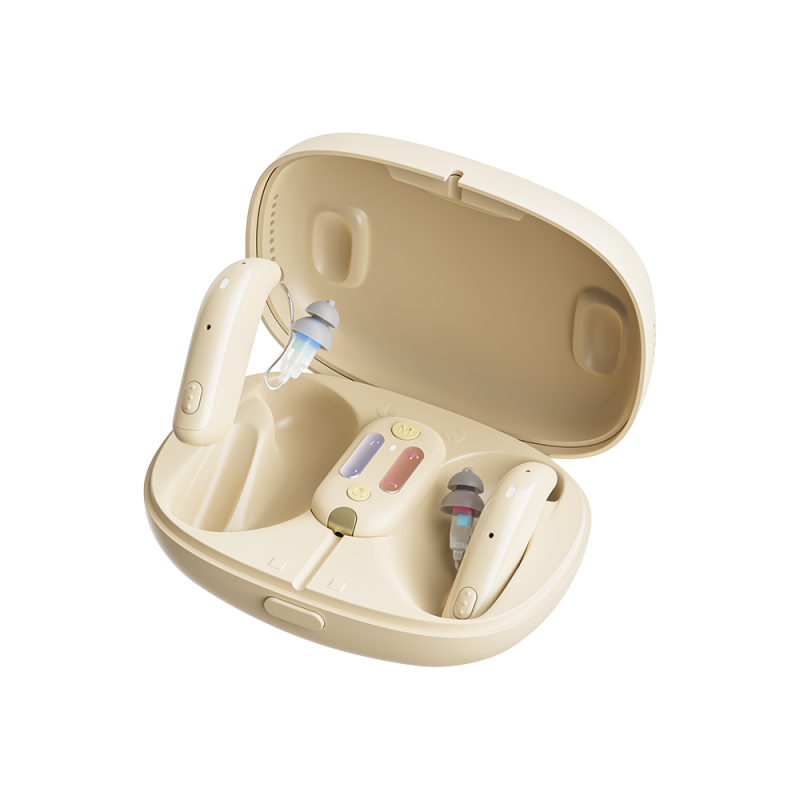
Open the charging case and take out the remote. There are four buttons in total.

  1. M Button (Mode/Switch Button):​​ Press once to cycle through different scene modes (Intelligent Mode / Noisy Mode / Outdoor Mode / Indoor Mode).
  2. Volume Buttons:​​ Adjust volume for the left and right hearing aids.
  3. Find Button (Indoor Locator):​​ When a hearing aid is lost indoors, close indoor lights and curtains, then press this button. The blue indicator light on the hearing aid will flash for 2 minutes to help locate it. This function works best at night."
  1. In Hearing Mode:​​ Short press to increase/decrease volume by 1 level (3dB per level).
  2. In Connected Mode (with Phone):​​ Short press to answer an incoming call; Long press (2 seconds) to end a call.
  3. ​​In Hearing Mode:​​ Long press (3 seconds) to power the hearing aid On/Off."
  1. Apple Users: After opening the packaging, take out the card with the QR code. Use the QR code scanning function in your Apple phone's browser to scan the QR code dedicated to Apple users. This will redirect you to the App Store. Then click ""Download"". Alternatively, open the App Store directly, search for ""Flysound"" in the search bar, and click download.
  2. Android Users: After opening the packaging, take out the card with the QR code. Use the QR code scanning function in your Android phone's browser to scan the QR code dedicated to Android users. This will redirect you to the download page. Click ""Download"". If your phone supports it, you can also open Google Play, search for ""Flysound"" in the search bar, and click download."

"If it's the first time using, ensure the Flysound APP is installed on your phone and Bluetooth is turned on.

  1. Open the charging case, remove the left/right hearing aids one by one, remove the protective film, place them back into the charging case one by one, and close the lid to activate the hearing aids.
  2. Open the phone APP, register and log in to an account following the prompts.
  3. Open the charging case. You will see the blue indicator lights on both hearing aids flashing, indicating they are ready for pairing.
  4. On the ""Add Device"" screen of the logged-in APP, click ""Add"". ""Hearing aid"" will be found via Bluetooth. Click ""Pair"". Once connected, the fitting interface will automatically appear."

With no obstructions between the hearing aids and phone, the maximum connection range is 10 meters.

Open Flysound APP, connect to hearing aids. Go to Settings interface, click "Restore Factory Settings". The hearing aids will reset and disconnect. Install Flysound APP on the new phone and connect to the hearing aids following pairing prompts.

After wearing the hearing aids, turn on phone Bluetooth, find and connect to the "hearing aid" device. On incoming call: short press hearing aid button to answer; long press for 2 seconds to end call.

After wearing the hearing aids, turn on phone Bluetooth, find and connect to the "hearing aid" device. Then play music/videos on your phone to hear through the aids.

After wearing the hearing aids, open the Flysound APP, turn on phone Bluetooth, find the "hearing aid" device and connect. In the APP's Tinnitus Management section, click "Play" on the white noise option. White noise will play through the hearing aids to help mask tinnitus.

The hearing aids have 4 scene modes:

  1. ​​Intelligent Mode:​​ Automatically detects the user's environment and switches to the optimal listening scene.
  2. Noisy Mode:​​ Optimized for noisy environments with multiple speakers (e.g., mall, restaurant, airport).
  3. Outdoor Mode:​​ Optimized for outdoor traffic environments (e.g., streets, squares).
  4. Indoor Mode:​​ Optimized for quieter environments (e.g., home

There are two ways to switch scenes:

  1. ​​Via Phone APP:​​ Open the APP and ensure the phone is connected with hearing aids. Click "Switch Scene" in the APP control interface.
  2. ​​Via Remote Control:​​ Open the charging case, take out the remote, and press the "M" button at the top to switch scene modes.
  3. After successfully switching scenes, the hearing aid will emit 1 to 4 "beeps" to indicate the mode, and the scene mode in the APP will also update.

The Speech Focus function enhances speech clarity directly in front of you by amplifying those sounds while dampening sounds from the sides and rear. Simply enable "Speech Focus" in the APP. To hear sounds clearly from the sides or rear, disable "Speech Focus" in the APP.

Remote Fitting via APP helps optimize hearing aid performance. Before using it, contact your hearing care professional or the customer service email to schedule a remote fitting session.

Yes. In the APP, go to the connected hearing aid device, enter Settings interface, then click "Hearing Aid Fitting" to re-fit your hearing.

Flysound APP supports all mainstream phone brands, including Apple, Samsung, Xiaomi, Huawei, OPPO, VIVO, Google, Honor, etc.

Flysound hearing aids support all Auracast-enabled transmitters available on the market. You can connect to Auracast devices via the APP for remote wireless audio transmission in environments like classrooms, cinemas, and theaters, significantly improving speech recognition.

  1. Place hearing aids back in the charging case and observe the case indicator lights:
    • 4 lights flashing: Battery 75%-100%
    • 3 lights flashing: Battery 50%-75%
    • 2 lights flashing: Battery 25%-50%
    • 1 light flashing: Battery 0%-25% (Needs charging)
  2. Open the phone APP and connect the hearing aids. The battery level is displayed below the hearing aid images.

After a full charge, the hearing aids can be used in hearing mode for up to 14 hours. When streaming audio/video, usage is up to 7 hours. The portable charging case can fully recharge the hearing aids up to 4 times, enabling up to 70 hours of total usage.

  1. Place the hearing aids into the charging case and close the lid.
  2. Check the case indicator lights. If lights are not flashing or only one light is flashing, it indicates the case battery is low. Connect the case to a USB cable to charge the case.

Note: The charging case does not support USB-C/USB Type-C charging cables. It is recommended to use the original USB cable.

  1. Place the hearing aids into the charging case and close the lid.
  2. Connect the charging case to a USB cable to charge the case.
  3. The case will fully charge the hearing aids within 2 hours, then automatically start the drying mode. The case heats up and dries the hearing aids for about 2 hours.

Note: It is recommended to dry the hearing aids daily after use to maintain optimal performance and extend their lifespan.

Remove all hearing aids, close the charging case, then open it again. Observe the indicator lights:
• 4 lights flashing: Case battery 75%-100%
• 3 lights flashing: Case battery 50%-75%
• 2 lights flashing: Case battery 25%-50%
• 1 light flashing: Case battery 0%-25%

The charging case can fully charge the hearing aids up to 4 times, satisfying up to 70 hours of hearing aid usage.

  1. Placing the hearing aid in the charging case automatically powers it off.
  2. Removing the hearing aid from the charging case automatically powers it on after 3 seconds.
  3. Long press the button on the hearing aid for 3 seconds to power it On/Off manually.

Open Flysound APP, connect to hearing aids. Go to Settings interface, click "Restore Factory Settings". The hearing aids will reset to defaults and disconnect from the phone.

1. How to perform hearing fitting?
  1. Open the hearing aid charging case, then open the APP. After connecting the hearing aids, you can directly enter the hearing fitting process.
  2. In the fitting interface, you will see two options: "Pure tone test" and "Input Audiogram".
  3. Next, wear both hearing aids properly, then click "Pure tone test" on your phone screen.
  4. It will now detect ambient noise. If excessive ambient noise is detected, it will prompt you to move to a quieter environment. If the environment is suitable, click "Start Fitting".
  5. Perform pure-tone testing for left and right ears separately. Follow the prompts on the screen: click "Have Heard" if you hear the sound, or "can't hear" if you don't.
  6. After this step, you will see the hearing loss levels for both ears. Scroll to the bottom of the page and click "Save to Device".

First, ensure the phone is connected to the hearing aids.

  1. Open the phone APP, click "Start Fitting" on the main interface.
  2. Select "Input Audiogram", then enter the hearing thresholds for each frequency for the left and right ears as prompted.
  3. After input is complete, scroll to the bottom and click "Write to Device".

This hearing aid is suitable only for people with mild, moderate, moderately-severe, or severe hearing loss. It is NOT suitable for people with profound hearing loss.

Hearing aids provide assistance, they do not restore normal hearing or cure underlying medical causes of hearing loss. Users may need speech therapy or lip-reading training. Consistent use is essential to gain full benefits; infrequent use reduces effectiveness.

  1. Noise-Induced Hearing Loss
    ● Cause: Long-term exposure to high-decibel environments (e.g., factories, construction sites, karaoke venues) can damage the cochlear hair cells, leading to hearing decline.
    ● Example: Airport ground staff are at high risk of hearing loss due to frequent exposure to aircraft noise.
    ● Data: About one-third of hearing loss cases are related to noise exposure.
  2. Age-Related Hearing Loss
    ● Cause: With aging, auditory organs gradually degenerate, such as reduced cochlear hair cells and slower auditory nerve conduction.
    ● Features: Usually begins around age 60, affects both ears symmetrically, and progresses slowly.
  3. Sudden Hearing Loss
    ● Cause: Often unknown, but may be linked to viral infections, inner ear blood circulation disorders, or autoimmune conditions.
    ● Features: Rapid decline in hearing within 72 hours, often accompanied by tinnitus and dizziness. Requires prompt medical treatment.
  4. Other Causes
    ● Ear diseases: e.g., otitis media, otosclerosis.
    Medication side effects: e.g., ototoxic drugs such as aminoglycoside antibiotics.
    ● Genetic factors: Certain types of hearing loss are linked to gene mutations.
  1. Communication Barriers– Hearing decline affects verbal communication and makes conversations difficult.
  2. Social Isolation – Patients may avoid social activities and gradually disconnect from society.
  3. Cognitive Decline – Hearing loss is associated with an increased risk of dementia in older adults.
  4. Safety Risks – Reduced hearing impairs awareness of the surrounding environment, increasing the chance of accidents.
  1. Control Noise Exposure
    Stay away from loud noise sources, and wear protective earplugs or earmuffs when necessary (can reduce noise by 15–30 dB).
    Use headphones wisely: keep volume below 60% of the maximum, limit continuous use to under 60 minutes, and prefer over-ear headphones.
  2. Maintain a Healthy Lifestyle
    Balanced diet: Eat foods rich in vitamins A, C, E, zinc, and iron (e.g., carrots, oranges, nuts, lean meat).
    Regular exercise: Aerobic activities such as running or swimming improve inner ear blood circulation.
    Avoid smoking and excessive drinking: Both can damage blood vessels and reduce blood supply to the inner ear.
  3. Regular Hearing Checks
    Children: Recommended at 3 months, 6 months, 1 year, 2 years, and 3 years of age.
    Adults: Annual checks for those working in noisy environments; once every 2–3 years for the general population.
  1. Hearing Aids – Suitable for mild to moderate hearing loss, amplifying sounds to improve hearing ability.
  2. Cochlear Implants – Suitable for severe to profound hearing loss; convert sound signals into electrical impulses that directly stimulate the auditory nerve.
  3. Auditory Rehabilitation Training – Professional training programs to improve listening and communication skills.
  1. Raise Public Awareness – Help more people understand the risks of hearing loss and prevention strategies.
  2. Create a Healthy Environment – Reduce noise pollution and promote quiet, comfortable living spaces.
  3. Support People with Hearing Impairment – Provide more understanding, care, and assistance to those affected.
1. How to wear the anti-loss lanyard?

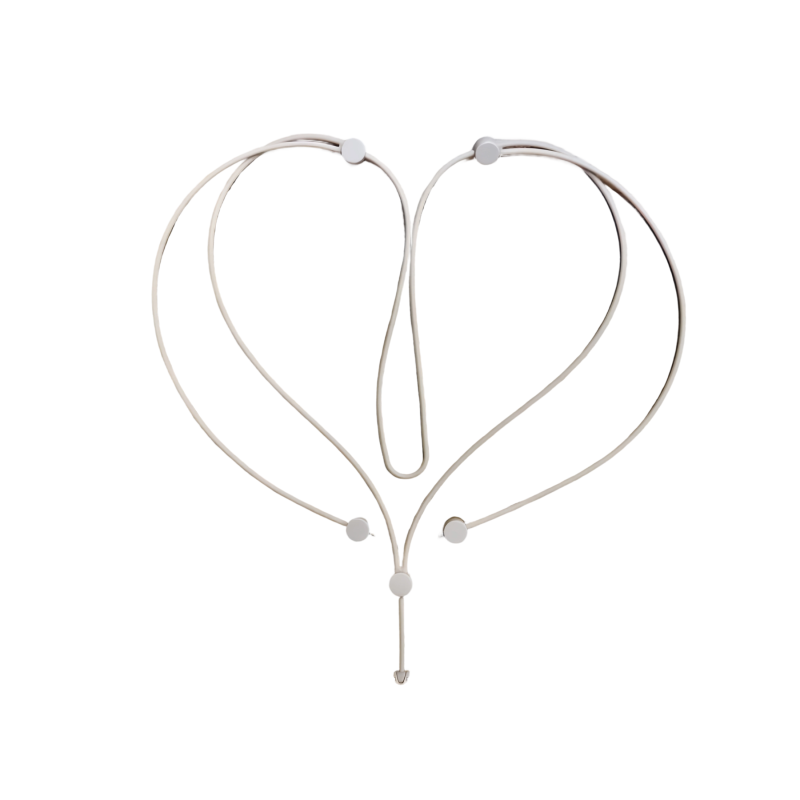
​For Integrated Anti-loss Lanyard:​​

  • Step 1: Place the integrated anti-loss lanyard around your neck.
  • Step 2: Align the small hole at the bottom of the hearing aid with the nut on the lanyard and screw it tight.
  • Step 3: Attach the remote control to the lanyard's buckle.

​​For Semi-Hanging Anti-loss Lanyard:​​

  • Step 1: Place the lanyard around your neck.
  • Step 2: Align the small hole at the bottom of the hearing aid with the nut on the lanyard and screw it tight.
  • Step 3: Use the clip on the lanyard to attach it to the collar at the back of your neck to prevent slippage.
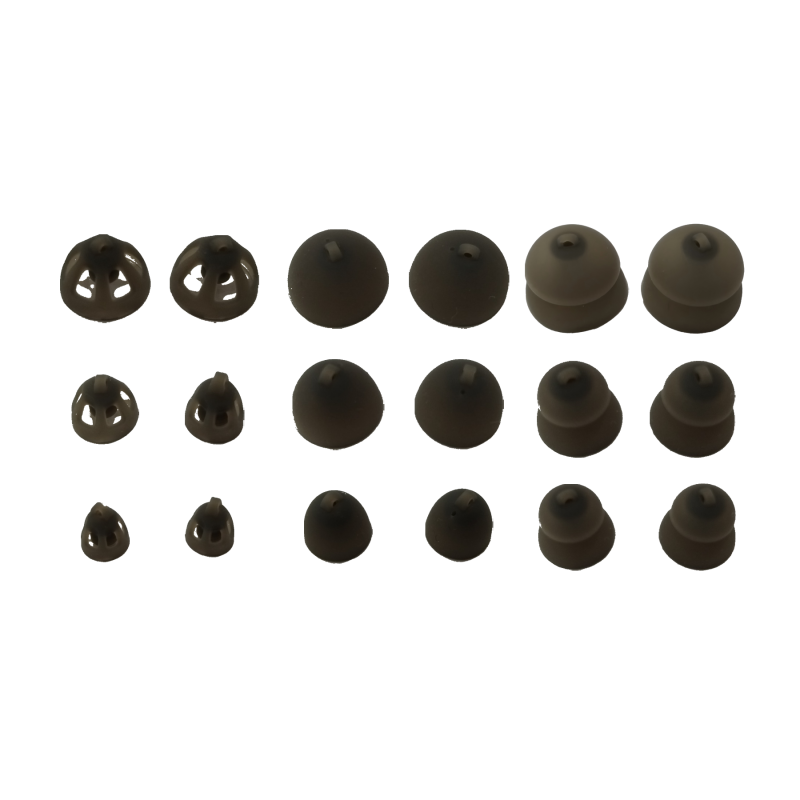
  1. If the ear tip feels loose or tight after first wear, select a different size from the accessories.
  2. If sound seems piercing or whistling occurs (poor seal), try other ear tip sizes to ensure a snug, secure fit.
  3. A feeling of occlusion (plugged ears) is normal initially. If you have mild/moderate loss ​​and​​ your hearing loss is less than 50dB across all frequencies on your audiogram, you can choose single-layer or open ear tips to reduce occlusion.

After removing the hearing aid, gently remove the original ear tip. Find an ear tip of the appropriate size in the accessory box. Align the opening of the new ear tip with the sound outlet of the hearing aid and press gently to secure it.

  • Physical Damage/Aging:​​ Replace immediately if yellowed, deformed, hardened, cracked, or lacking elasticity to prevent sound leakage or whistling.
  • Excessive Buildup:​​ Replace if the wax guard/wax filter is clogged with earwax/dust, affecting sound quality (muffled/distorted sound).
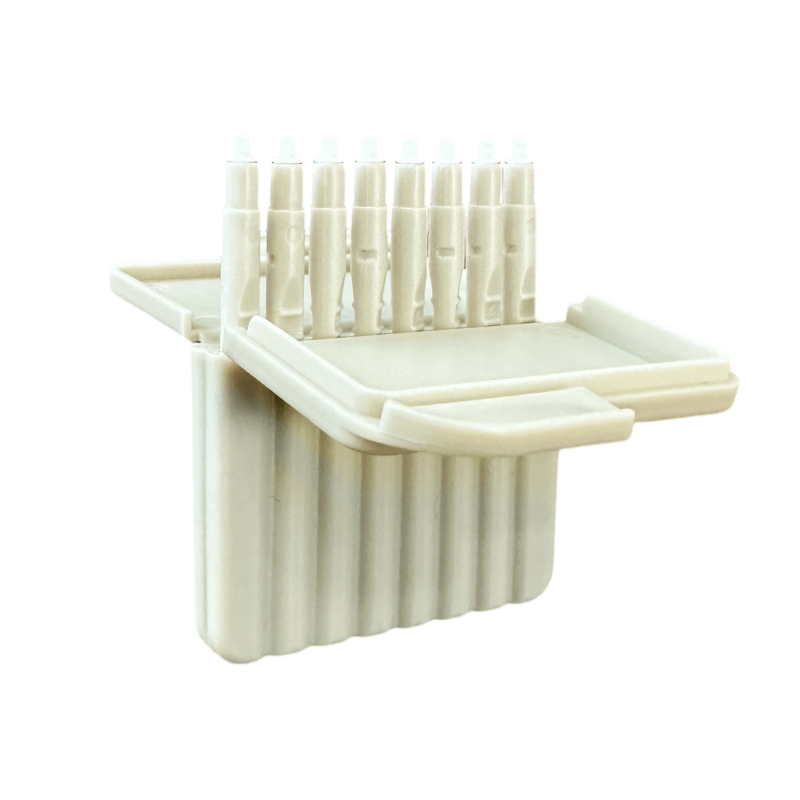
  1. Take out the wax guard tool kit from the packaging, open the lid, and take out a wax guard replacement tool.
  2. Remove the ear tip from the hearing aid that needs its wax guard replaced.
  3. Insert the hollow end of the replacement tool into the wax guard at the hearing aid receiver outlet to remove and discard the old wax guard.
  4. Insert the other end (with the new wax guard) of the tool into the receiver outlet. Push firmly to install securely, then pull the tool out. Be careful not to pull out the new wax guard.
  5. Finally, install the appropriate size ear tip to continue using the hearing aid.

If the hearing aid has no sound due to being dropped or receiver damage, contact a professional hearing care professional. They will gently disconnect the old receiver module from the hearing aid socket and plug in the new receiver module's connector. Caution: Do not use excessive force during replacement to avoid breaking the receiver wire.

Hearing aids are precision electronic devices requiring careful maintenance:

  1. Keep dry; water can cause short circuits.
  2. Avoid dropping; can damage the receiver (speaker).
  3. Avoid impacts/knocks; can damage the receiver.
  4. Handle gently.
  5. Do NOT​​ dry in microwave or hairdryer.
  6. Place in charging case daily after use and plug case in for automatic drying.
  7. Before wearing, check microphone port and ear tip for blockages (earwax/dust) and clean with brush.

Hearing aids, charging case, and remote control are covered by a one-year warranty. If the product has manufacturing defects within one year (not caused by user damage), free repair is provided.

If a product defect is found within one month of receiving the device, and the original packaging is intact, free replacement is available.

Visit our official website www.flysounds.com or contact our customer service phone/email.

Email: support@flysounds.com

Phone: +1 (833) 658-9090 (24/7 Support)

No, battery replacement is not needed. The hearing aids, remote control, and charging case contain rechargeable lithium batteries.

No. The charging case has a built-in dryer. Place the hearing aids in the case and connect it to power using the original USB cable. After approximately 2 hours, the case will automatically start drying for about 2 hours.

For longevity, these hearing aids feature IP68 water resistance. If accidentally wet, simply place them in the charging case for drying or use a dedicated hearing aid dryer, and they should function normally after drying.

  1. Daily Drying:​​ After daily use, place hearing aids in the case, close the lid, and connect the case to the original USB cable. Within 2 hours, the case's built-in electronic dryer will automatically dry the aids.
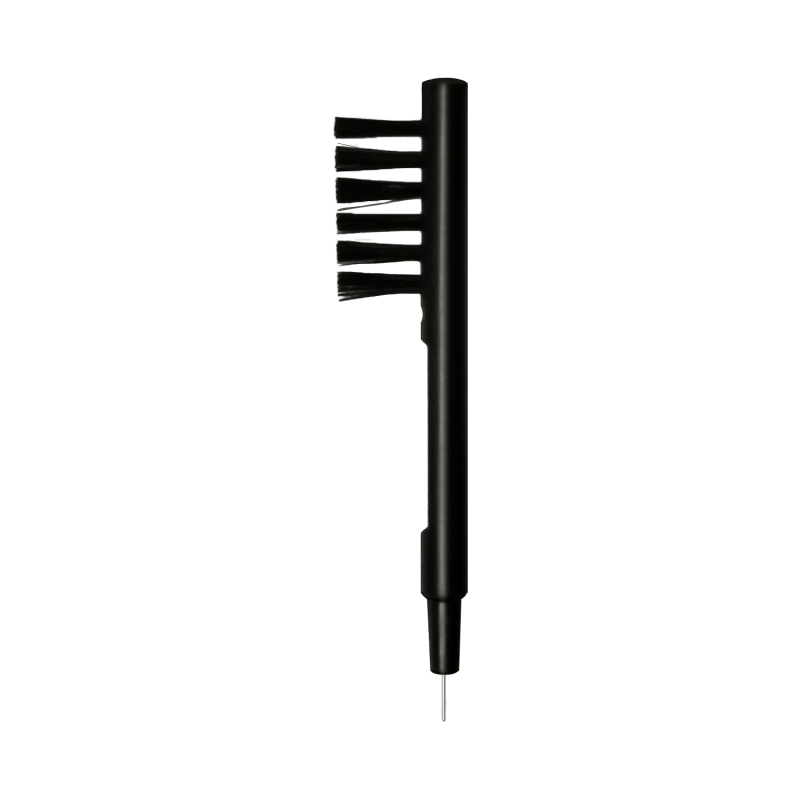
  2. Weekly Cleaning:​​ Use the cleaning brush weekly to clean the ear tips, wax guards, and microphone ports to prevent earwax blockages.
  3. Wax Guard Replacement:​​ Replace the wax guards in the receiver outlet every three months using the wax guard replacement tool to prevent blockage.

Use the included cleaning brush to clean the ear tips and microphone areas of the hearing aid. Ear tips inserted in the ear canal are prone to earwax buildup. Clean at least once a week for optimal performance.

  1. After each removal, check ear tips for blockages; clean with a dry, lint-free cloth or brush.
  2. DO NOT​​ use cleaners like detergents or soap.
  3. Battery Care:​​ If storing long-term (>2 weeks), fully charge first. Store away from high temperature/humidity to avoid battery damage. Charge the aids every 6 months during storage to prolong battery lifespan.
1. How to deal with hearing aid whistling (feedback)?

Improper wearing when using the hearing aids for the first time may cause "whistling" (feedback), especially at maximum volume.
​​Common causes and solutions:​​

  1. Earwax in ear canal:​​ Clean earwax first, then wear.
  2. Poor seal between ear tip and ear canal:​​ Re-wear correctly.
  3. Hearing aid not fully inserted:​​ Whistling stops once fully inserted.
  4. During removal:​​ Whistling stops once removed.
  5. Hearing aid aging/damage:​​ Needs replacement.
  6. Wrong ear tip size:​​ Choose the correct size double-layer ear tip.
  7. Blocked microphone ports:​​ Check for blockages and clean if necessary.
  8. Using open or single-layer ear tips:​​ Replace with double-layer ear tips.
  9. Volume too high:​​ Lower the volume.
  10. Enable "Feedback Eliminator"​​ in the APP after connection.
  1. Open APP, change Noise Reduction level to "High".
  2. Lower the hearing aid volume.
  3. Enable "Speech Focus" function in the APP.

If first-time users feel the noise is loud and uncomfortable, this is normal. Hearing loss users receive less surrounding noise before wearing hearing aids. After wearing, the hearing aid amplifies speech and background noise simultaneously. First-time users should wear the hearing aids for at least 5 hours daily on average. The brain gradually adapts to the noise, leading to the best wearing experience.

  1. Increase the hearing aid volume.
  2. Check battery level; if low, charge in the case.
  3. Check for earwax in the ear canal; clean if needed.
  4. Check if ear tip is blocked; clean with brush.
  5. Check if microphone port is blocked; clean with brush.
  6. Check if the receiver wax guard is blocked; replace with the wax guard kit.
  7. Check if hearing has declined; reopen the hearing aid in the APP, click "Settings", then "Hearing Fitting" to re-fit.
  1. Check if battery is dead; charge in case for 2 hours.
  2. Check if hearing aid is powered on; long press the button (3 sec) to turn on.
  3. Check if microphone port is blocked; clean with brush.
  4. Check if the receiver wax guard is blocked; replace with the wax guard kit.
  5. Check battery level; if low, charge in the case.
  6. Check for earwax in the ear canal; clean if needed.
  7. Check if volume is too low; increase volume.
  8. Check if you have profound hearing loss; this device is not suitable for profound hearing loss.
  9. Check if hearing aid is damp/water-damaged; dry in the case for at least 4 hours.
  1. Damaged Receiver:​​ The hearing aid may have been dropped or impacted. Contact your seller or the warranty contact.
  2. Moisture/Water Damage:​​ Place the aid in the charging case, connect by using the original USB cable; after approx. 2 hours, the drying cycle will start automatically for another 2 hours.
  3. Poor Maintenance:​​ Perform regular daily maintenance.
  1. Check if volume is set to minimum.
  2. Check for blockages in the ear tip or microphone port.
  3. Check for moisture/water damage.
  4. Check if dropped, potentially damaging the receiver.
  5. Contact your seller or warranty contact.
  1. Check if the unconnected aid has low battery; charge both aids in the case for 2 hours, then retry.
  2. Check if the charging case battery is low; place both aids in the case, connect the case to power for 2 hours, then retry.
  3. If both aids are charged and powered on, place them in the charging case. Within 8 seconds, quickly open and close the case lid 5 times. After the case's 4 indicators flash 5 times, the left and right hearing aid are repaired. Then reconnect via APP.
  1. Check if using the original USB cable.
  2. Check if the power bank or adapter supports 5V/2A or 5V/1A.
  3. Check if using a USB Type-C/USB-C cable; the case only supports standard USB cables.
  4. Check if using a laptop charging cable; the case does not support laptop charging cables.
  1. Check charging case battery: If only 1 indicator light flashes, the case battery is low and cannot charge the aids. Charge the case first.
  2. Ensure hearing aids properly contact the charging pins in the case.
  3. Clean any dirt/debris from the charging contacts on the hearing aid or the pins in the case by using the brush.
  4. Ensure charging pins in the case spring back fully; gently push them if stuck.
  5. Check if using incorrect charger/power bank or USB-C cable; use the original USB cable and standard 5V charger.
  1. Contact your seller.
  2. Follow the troubleshooting guide in the user manual or APP's "User Guide".
  • Step 1: Wipe off water/moisture with a towel or tissue.
  • Step 2: Place in the charging case, connect the case to a charging cable. The case will automatically start drying after 2 hours.

If the hearing aid still doesn't work, continue drying in the case until it functions normally.

When a hearing aid is accidentally lost at home, press the "Find" button on the remote control. The blue indicator light on the hearing aid will flash continuously for 2 minutes. Close the curtains and turn off all indoor lights to help locate the missing hearing aid. This function works best at night.

Open the APP, go to "Me" → "My Devices" → "Last Location" to view the place where the hearing aid last connected to the phone.

1. Why does my own voice sound loud?

Hearing your own voice loudly is normal initially, as the hearing aid amplifies both others' and your own voice. After wearing for over one month, the brain adapts.
Additionally, if you have mild/moderate loss ​​and​​ your hearing loss is ≤50dB across all frequencies, choose single-layer or open ear tips to reduce the amplification of your own voice.

A plugged feeling is common initially, similar to wearing earbuds, caused by trapped low-frequency sounds in the ear canal. After wearing for 2+ weeks, the ears adapt and the feeling lessens.
Additionally:

  1. If you have mild/moderate loss ​​and​​ your hearing loss is ≤50dB across all frequencies, choose single-layer or open ear tips to reduce occlusion.
  2. Enable the "Occlusion Relief" function in the app.

Open the APP, connect to hearing aids, and enable the "Speech Focus" function. The hearing aid will amplify sounds directly in front of you while suppressing sounds from the sides and rear, enhancing speech clarity.

First-time users need about one month of adaptation.

  1. Week 1:​​ Wear 1-2 hours daily; converse with family in quiet settings; do chores or read.
  2. Week 2:​​ Wear 3-4 hours daily; use in quiet environments like neighborhoods/parks when talking with friends/family.
  3. Week 3:​​ Wear 5-6 hours daily; try conversing in slightly noisier environments like restaurants or supermarkets.
  4. Week 4:​​ After adapting to the above, you can now wear the aids full-time for learning, communication, entertainment, and daily listening activities.

Hearing aids are not recommended if you have:

  1. Congenital or traumatic ear deformities.
  2. Ear discharge (pus/fluid) within the last 90 days.
  3. Sudden deafness or severe hearing decline within the last 90 days.
  4. Acute or chronic dizziness/vertigo.
  5. Sudden hearing loss in one ear within the last 90 days.
  6. Ear pain or severe discomfort.
  7. Earwax impaction (cerumen blockage).
  1. Follow Instructions:​​ Use as per manual or customer service guidance; misuse may cause sudden/permanent damage.
  2. Personalized Use:​​ Do NOT share hearing aids; improper fitting can cause permanent damage.
  3. Choking Hazard:​​ Keep away from children/cognitively impaired individuals.
  4. Cochlear Implant (CI) Separation:​​ If using a CI in one ear and HA in the other, maintain ​​at least 1 cm distance​​ between devices. The CI's magnet/coil field can permanently damage the HA's speaker. Do NOT store together.
  5. ​​Remove During Medical Procedures:​​ Remove before X-rays, CT, MR, PET scans, diathermy, or surgery; strong electromagnetic fields cause damage.
  6. Heat Exposure:​​ Do NOT leave hearing aids in hot places like cars in direct sunlight.
  7. Safe Drying Only:​​ Do NOT use microwave or hairdryer.
  8. Avoid During Water Activities:​​ Remove before swimming, bathing, showering, shaving, applying makeup, perfume, hairspray, or sunscreen. Wear only after ears/skin are completely dry.